I have a new fuel tank due to be delivered in the next day or two. The boat is a 17’ HenryO Hornet, dual console. It has a hold built into the front section of the floor with a screwed on sole plate covering it. I have the old tank removed and the hold cleaned up and ready for the new tank. The previous tank was installed with expanding foam injected around the front end and cleats around the back end. That installation worked well as the old tank was still stuck to the foam and neither the tank nor the hold show any signs that the tank was moving, at all. No abrasions/wear spots. I’d like to install the new tank the exact same way (with the addition of a few cleats along the top edge).
Question: what kind of sprayed in or blown-in foam is appropriate for this? Would that low expansion insulating foam from Home Depot be appropriate? I don’t think I need more than 1/2 gallon of expanded volume of dried foam. The tank is custom built to match the shape of the hold. So the gap between the tank and hold is relatively small.
And, if anyone has any experience with this trick and has suggestions, please speak up.
Do NOT use the spray foam from Lowes. It is very low density and will compact over time. Not meant for bearing much weight.
What’s your timeframe on this project?
I have the two-part foam you need, and will definately be able to spare the small amount you’re talking about.
You will want polyurethane closed cell in 2lb density. Some people use 4lb, but it isn’t necessary unless you’re supporting the whole boat with the stuff (henry O or mckee) . 4lb foam expands a good bit less than 2lb, so you basically will have to buy more of it to go the 4lb route. Cost per lb is about the same no matter which density you go with. You obviously spend twice the money going with twice the density…
Comes in kits. Part A and Part B. Mix in 1:1 ratio and pour where you want it without delay, but pour slowly or you’ll get uneven expansion and a mess!
One other tip. You need to devise some sort of bracing to hold the tank into place during the foam pour and cure. Otherwise, the tank will float up, and you’ll have a mess to resolve. Some people lag in straps. Others put plywood over the area and load it down with weight. Other methods will work- whatever you can do to temporarily hold the tank in place until the foam is fully cured. What I’ll do is use fiberglass dowels run into the stringers. The dowels will go through the drilled brackets I got Marc Googer to weld onto the top of my tank. These aren’t for holding the tank when it’s put into use. They’re for holding the tank in place while it’s foamed in. The foam holds it in place for good.
Phin,
Thanks for the education. According to RDS, the tank is on the truck en route and may be delivered today or tomorrow. I have a little work to get the new cleats cut and I may put a second coat of epoxy on the tank, depending on what it looks like coming from RDS. 'Paid them to apply the first coat. So, I may be trying to install it late this week or this weekend. Where did you buy your foam?
Reelescape,
I thought about just fastening the thing in with cleats. There is enough room along the top and back edges to do it. But, I’ve gone back and forth with the decision. The problems with the old tank were on top and were moisture related. The primary failure was the vent tube was badly corroded. But, there were pits in the surface of the top also. Some are pretty deep relative to the thickness of the sheet. So, it appears that the epoxy coated aluminum delt with sitting in foam pretty well. It was the top surface and fittings that deteriorated. (I’ve cut a new hatch into the sole plate so I can leave that hold open when she’s not in the water to help ventilate/dry it.) The thing that is really appealing about sitting the front half of the tank in foam is that there was absolutely no abrasion on the old tank. It sat still its entire life and got bounced around pretty good from time to time. I worry that if I don’t use foam, as things are stressed over time, the tank may eventually find a little wiggle room and wiggle, causing abrasion. That would go through the epoxy pretty quickly and then to corrosion. But, like I said, I’ve gone back and forth on this. If you have further thoughts, I’d be interested to hear/read.
Don’t mean to pit you two against each other, but, 'seems like a good chance to think through the situation. Thanks to both of you.
You bring up a good point. As I mentioned above, all the problems with the old tank are on top. The paint even failed on the top and looked pretty good everywhere else… even where I popped it out of the old foam, the paint was intact. Condensation had to be the problem. Foaming the bottom and sides would reduce that, significantly.
He isn’t kidding about that. The warmer it is, the faster it kicks and starts expanding. You have about 10-15 seconds of mixing time, then you need to be pouring. Work in small batches at a time, especially until you get a feel for it. Start with 6 ounces of part A and 6 ounces of part B. Mix until it looks like a milk shake and pour.
The stuff is a mess and sticks to everything, have a can of acetone and a rag handy.
The tank cannot actually degrade to where you get a leak unless air contacts it. Air can contact the inside of your tank unless there’s fuel in it…
The only way you can slow down the exchange of hot and cold air inside your tank is to insulate the tank or shield it somehow. If there’s air in contact with metal, it will be a heat exchanger and speed up the exchange of hot/cold air, i.e. moisture production. Ethanol worsens all this of course, because it cleans everything and gives up new metal surface for the air to attack.
If you have a boat big enough to have full ventilation around the tank, then that’s the best way because you can clean the salt off the tank and keep it clean. With boats our size, foaming them is best in my opinion. I have replaced the fuel tanks in a couple boats, and the ones that were foamed the most did not have issues where the foam was EVEN where there was standing water in the bottom of the cavity between the foam and hull. In my current boat, 34 years old, the fuel system failure was in the aluminum vent lines, which were not only thin, but also encapsulated in foam (running under the deck) withOUT any ground strap or wire whatsoever. They were not grounded to the tank or fill or vent fittings because there was a short piece of rubber hose at each end of the aluminum tubing.
Metal will corrode no matter what you do. You can hook a small charge to it, ground it, put sacrificial zincs in- whatever. All we are trying to do is slow corrosion down.
The biggest things to speed up corrosion, to me, are a friction source, dissimilar metals, salt, moisture and/or air.
If you coat an aluminum tank with epoxy and set it with foam, then you have gone a long way towards slowing the corrosion down. You have blocked the moisture, salt and air with the epoxy, and you’ve blocked the air and moisture even further with the foam IF you don’t allow water to stand on TOP of everything for a significant amount of time. The friction factor is taken away when a tank is foamed in properly also.
quote:
Here's the true drawback of plastic, though. It needs air space around it so the tank can expand and contract.
That is the first drawback, for sure. In fact manufacturers of plastic tanks specify that you must allow 5% for expansion in every direction when mounting. On a 36" tank that’s almost a 2" gap. But at the same time, USCG and ABYC specifies that a tank must be secured so that movement in every direction, including up, is less than 1/4". It is difficult to mechanically secure a plastic tank.
The second drawback, as Phin mentioned is permeation. Gasoline vapors actually pass through the molecular gaps in the plastic and create gas fumes in the compartment or bilge. Again, regulations require that any closed compartment with a plastic tank have a ventilation system with an intake and exhaust, the size of which varies by compartment size, but generally a 2"-4" vent hole for each.
Tanks below the deck, in a compartment like that, are almost impossible to vent correctly, making aluminum the only smart choice in the above picture.
thanks for the info. But, I think the author of that post fails to consider a few dynamics. This is off topic in my own thread, but… He says you can only get between about 1/2 oz and 1 oz of condensation from a cubic meter of air. And, I think his point is correct as far as it goes. However, even if you only get a small fraction of an oz. from each over night condensation cycle, you can end up with the accumulation of multiple ounces. Further, as each fraction of an oz. condenses and runs from the inside wall of a tank down into the fuel it settles to the bottom. The fuel effectively acts as a buffer to keep it from evaporating back out. To get out, it must first move into solution (real chemistry class ‘solution’) with the gasoline and then escape off of the top surface of the gas. Since water is only very slightly soluble in gas, that is a very slow process.
Let a tank sit half full for a few months over winter in the SC low country and I bet you could accumulate a pint or two of water, easily. (An old trick in vacation homes to keep sinks and toilets from drying out and letting septic gases back into the house is to pour a little vegetable oil in each drain. Works great.)
Back on topic. I’m convinced to foam in as much of the tank as I can. I think I can get the bottom and three sides if I’m quick and lucky. But, thinking about mixing enough to do that, spreading it reasonably, placing the tank, and getting the cleats fastened sounds like it is going to be a race. I think I’ll call in a friend and see if we can double team it. I’ll try to remember to document the ordeal.
Anyone have any idea of a local supplier for the foam. I can get it from Merton’s, obviously (thanks for the link Phin), but, that may put me back another weekend. And, I’m jonesin’ to get the old girl put back together and get on the water.
I guess I’m lucky the fuel tank hold is not rectangular. The bottom is flat going from the rear forward about 1/2 its length. Then it tapers up about 1/3 t
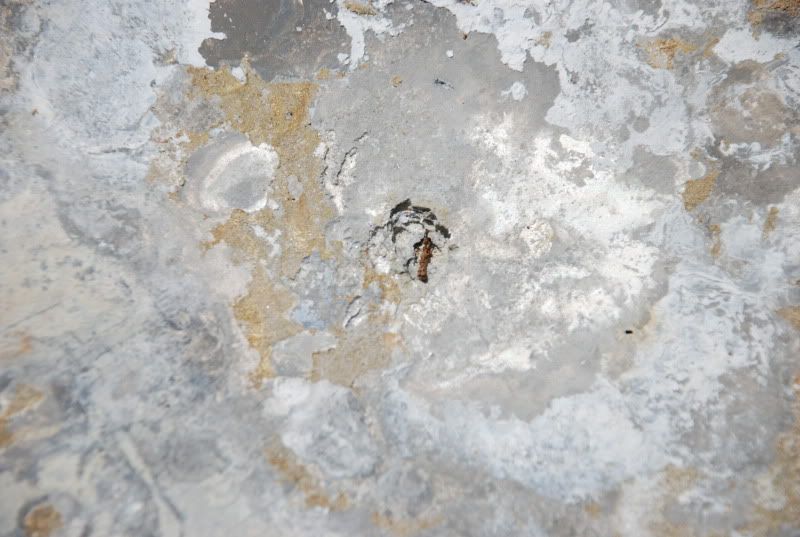
This was ~ 15 yrs. old and foamed beyond belief. I think a lot of corrosion on top is salt water sitting on top. This of course caused by a leaking hatch and poor
tank coating.
Post some pics of your stuff. I’ve always liked those hulls!
quote:I think I can get the bottom and three sides if I'm quick and lucky. But, thinking about mixing enough to do that, spreading it reasonably, placing the tank, and getting the cleats fastened sounds like it is going to be a race. I think I'll call in a friend and see if we can double team it.
No, you don’t understand, don’t try to foam it in all at once. Take your time with small batches. You don’t need to be quick or lucky, just organized with a plan:wink: Don’t pour any foam into the compartment before setting the tank. I don’t think you realize the amount of expansion you will get, or how fast it happens. First place the tank on thick neoprene rubber strips abour 1/4 thick and 1" wide, about 6 of them. Wedge, weight and otherwise secure the tank in place temporarily so it can’t float. Now mix just a 6 ounce batch of the foam, 3 ounces of each part, stir it good for 15 seconds and pour it around the tank, focus on the corners first. It will pour like thick cream and will immediately begin expanding. Within 30 seconds it will expand roughly 8 times it’s initial volume. 12 ounces of it mixed will expand into roughly a 5 gallon bucket size block of foam.
After you pour one layer, wait a few minutes, let it expand take your time, make a drink, then mix another batch and pour it. Repeat until full. The new layer will bond to the old.
I’ve got enough here in Clyo, GA to do that, if you are anywhere close. West Marine usually carries it, and other good marine supply stores.
Thanks for the tutelage, Larry and Phin. The shim it, secure it and pour plan sounds much more manageable than what i was thinking. And thanks for the offer but Ga. Is a little bit of a haul from Charleston. I should be able to find some here.
I am currently in the process of removing my tank for repair. US Composites has the 4# foam kits for a decent price. From what I have been told by the boat restorers/builders at another forum 4# foam is the way to go. But as mentioned earlier,once you mix it you only have seconds to pour it. Small batches are the way.
The deed is done. The tank came in last week. Dry fit looked good. Played with a small amount of the foam to see how it behaved. Cut/installed some cleats to keep the tank still during the pouring and poured. It took about 6 or 7 pours of about 2 cups of foam (1 cup part A, 1 cup part B). Mix and pour as soon as you get the color consistent.
The cleats behind and on top of the back of the tank are permanent. The cross brace nearer the bow came back out after the foam had hardened.
The old girl is nearly back together. Rain chased me in yesterday afternoon, otherwise she would be ready for a shake-down cruise.
Thanks for all the advise. I think the install is a quality install. Should get plenty of life out of this tank.