This thread makes me all itchy
When this thread first started I thought it would be cool to do something like this. But with each round of pictures I realize I don’t have it in me. Hard to realize how many detailed steps go into it until you see them. Looks awesome, I’d love to have a boat laid out exactly how I wanted it.
Wellcraft V-20 sportfish with a 200 Evinrude
quote:
Originally posted by jwsThis thread makes me all itchy
Me too! I worked at scout for three weeks a long time ago and couldn’t take all that fiberglass in my skin everyday. Great job, keep it coming! I really like the trick with the balloons in the holes, thats shows experience right there!
'06 Mckee Craft
184 Marathon
DF140 Suzuki
I couldn’t do that with 10,000 adderall pills…Just wow…thats focus right there.
best thru hull hardware I could find

Anybody know where I can get some bronze nuts, washers and bolts locally? (three of each)
www.scmarine.org
www.joinrfa.com
Luke 8:22-25
Charleston Rigging on Morrison or maybe Warren Fasteners on Cosgrove? Maybe?
j
Another coat in the bilge
Trimming front of console base
Grinding console base and splashwell
A little sanding under the bow
Shooting putty into the gaps between bulkheads and hose conduits
One last dry fit
Foam for under the cockpit fishboxes
Too much at once
[IMG]http://i
I started reading your posts this past week and I have to say it has been very interested reading of were you started and were you at now (the pictures are awsome) on this MAJOR project. Your boat is going to be one mean fishing machine… You are going to have to have a big launch ceremony (like when the Navy has when they launch a new ship)… I tell you what I would be there to see you launch it and I would have to say that most people who has been following this post would also be there… Thanks for sharing your project on here and I can’t wait to see the finish product…
Army (RET)-(C/S-Charlie22)
2010 1860 Duracraft
60hp Mercury EFI
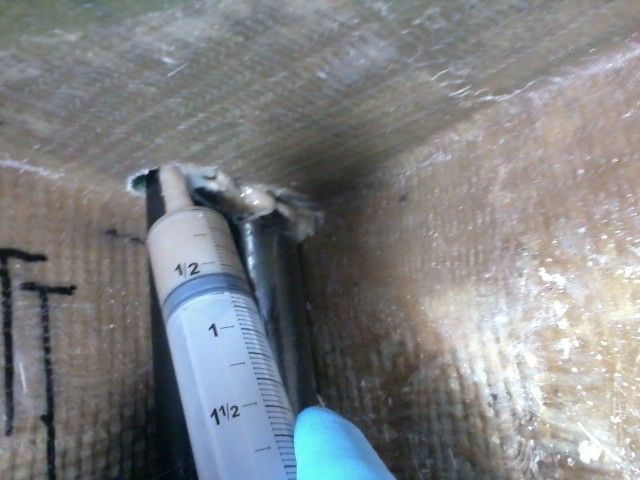
Maybe its an optical illussion but is the fuel inlet on the top of your tank not higher than where your fuel coduit comes out in the boat? Wont that make it difficult to fill? Perhaps gurgling?
“Endeavor to Persevere.
Give,Give… Never Take.”
EC
Zorro,
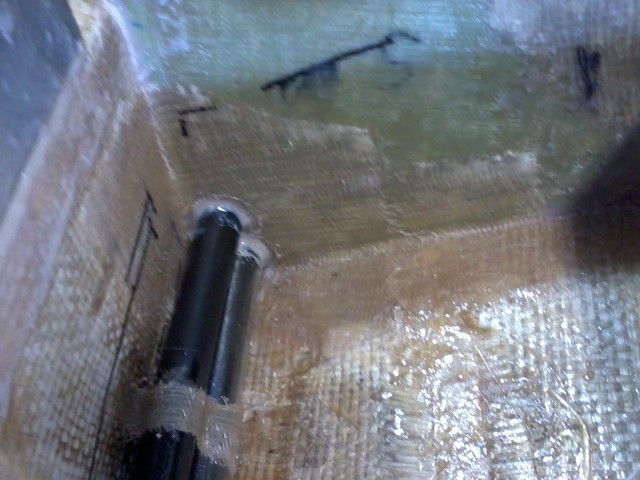
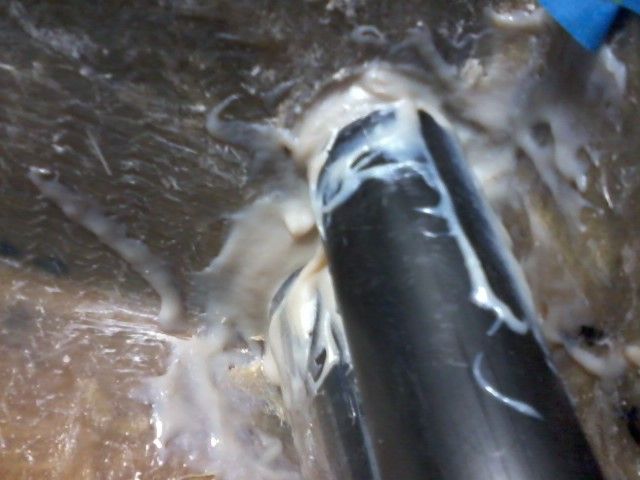
This issue actually took a whole lot of thought, and I went with the best possible setup I could make work. One option would have been to do separate conduits for the vent line and fill line. I decided against that because it would have actually made for even more difficulty to change out the fill hose in the future because it would be a smaller conduit to work with.
The single fuel lines conduit shown above is as high as it could go with drainage from front boxes staying as high as deck height as possible, i.e. not below the waterline. I would have liked it just a tad higher, but it isn’t possible without having drainage from the fwd seating on the port side dip down below the waterline. (drain line is above the fuel conduit directly below the deck now) I wanted all my drains above the waterline except the console interior and bilge, so the fuel conduit had to go where it is. I couldn’t figure out any different way to do it without going to a smaller I.D. conduit, and that would defeat the whole purpose of having a conduit IMO.
There won’t be a fuel fill problem because the conduit has a slight downward, and backward, slope to it from under the gunnel to the stringer. The conduit is 3" I.D. so although the bottom of where it goes through the stringer is 1/2" lower than the top of the tank, the hose won’t have that dip in it because the outboard end of the conduit is about 2" higher than where it goes through the stringer. To get the slope, the base of the outlet through the stringer had to go a little lower than the tank. I am planning on glassing inside the conduit a little to prevent buildup of anything. Probably not a big deal, but why not?
www.scmarine.org
www.joinrfa.com
Luke 8:22-25
quote:
Originally posted by PhinZorro,
This issue actually took a whole lot of thought, and I went with the best possible setup I could make work. One option would have been to do separate conduits for the vent line and fill line. I decided against that because it would have actually made for even more difficulty to change out the fill hose in the future because it would be a smaller conduit to work with.The single fuel lines conduit shown above is as high as it could go with drainage from front boxes staying as high as deck height as possible, i.e. not below the waterline. I would have liked it just a tad higher, but it isn’t possible without having drainage from the fwd seating on the port side dip down below the waterline. (drain line is above the fuel conduit directly below the deck now) I wanted all my drains above the waterline except the console interior and bilge, so the fuel conduit had to go where it is. I couldn’t figure out any different way to do it without going to a smaller I.D. conduit, and that would defeat the whole purpose of having a conduit IMO.
There won’t be a fuel fill problem because the conduit has a slight downward, and backward, slope to it from under the gunnel to the stringer. The conduit is 3" I.D. so although the bottom of where it goes through the stringer is 1/2" lower than the top of the tank, the hose won’t have that dip in it because the outboard end of the conduit is about 2" higher than where it goes through the stringer. To get the slope, the base of the outlet through the stringer had to go a little lower than the tank. I am planning on glassing inside the conduit a little to prevent buildup of anything. Probably not a big deal, but why not?
www.scmarine.org
www.joinrfa.com
Luke 8:22-25
K. Looks great keep up the good work.
Depends on the strength and quality of what you find from scrap boats. Could be a boat that’s been on the bottom of a creek for a few months or could be a boat that was totalled by an insurance company after being wrecked. Difference in what you’re pulling out of it is going to be a little significant then.
The parts I’m using out of other boats are extremely strong and would cost me a few hundred dollars just in materials to make myself.
Take the transom livewell for example. It would take me weeks to build a mold and fab it or to cold mold it, and it wouldn’t turn out as clean or as strong.
The fish box floors saved me lots of resin, filler and work mostly because they were already smooth- that’s the key with them. Getting the end product where it’s smooth with no print through from the cloth pattern in the future is very time consuming. All the time I can save using the pre-made parts adds up to months of work even though it appears like a lot of work fitting them in to my boat.
I am at only 10 gallons of resin used so far on this project. With vinylester resin, when I get parts like those flat pieces I used for the fish box floors, that’s probably a half gallon of resin saved as well as a few lbs of cloth. Add in milled glass fiber, cabosil and microspheres to fill and fair it smooth, and you’re probably looking at maybe 30 or 40 bucks of materials per side.
I am not sure on my cloth usage yet, but I am not but about half way through the cloth I purchased up front. I am more than halfway through with my glassing already because below deck and the transom is where the most strength is needed. I am kind of working through the materials as I go with a section-by-section basis rather than trying to have an overall limitation or goal with everything used. It is a fine line between focusing too much on single areas and focusing too much on the overall project. You have to plan several steps ahead as you’re doing stuff or else you’re cutting things out and redoing them, which again is wastage of
Ok…I am now TOTALLY CONVINCED that you are really some super hero in disguise…perhaps “Concentration Man” or perhaps “Attention to Detail Dude”, or even “Anal Retentive Guy”![]()
Honestly, I can’t even imagine having the dedication to getting something like this done. Good on you Phin!!

“People sleep peaceably in their beds at night only because rough men stand ready to do violence on their behalf.”
George Orwell
Thank you
More good stuff.
Cliff
2006 pioneer 197 SF 150 4s
great stuff! thanks for sharing
Let’s see here…
![]()
quote:
Originally posted by Phinshort term work plan:
sand bilge bulkhead
mask fwd bilge area off
flood coat bilge bulkhead vertical
sand bilge bulkhead and stringer base corners’ flood coat
coat bilge with Interprotect2000e epoxy
sand fwd fish box transition area
apply more flood coat to fwd fish box transition area
sand fwd fish box transition area flood coat
coat fwd fish box newly glassed areas with 2000e epoxy
apply second coat of epoxy to bilge
apply second coat of epoxy to fwd box newly glassed areas
drill cockpit fishbox bulkhead vertical bottom corners for plumbing runs
glass in thin polycarbonate tubes (8ft long fluorescent light bulb protectors @ $5 each) as plumbing conduits for hose lines run under cockpit fish boxes
design fish box drain corners
complete fish box interior structure glassing
sand flood coated fish box outboard interior verticals
flood coat all of fish box interior
tab in cockpit fish box interiors and foam between interiors and hull/stringers
sand cockpit fish box interiors’ flood coats
over drill thru-hull fittings’ holes for cockpit fish box drains
bevel edges, backfill with putty, redrill for fittings
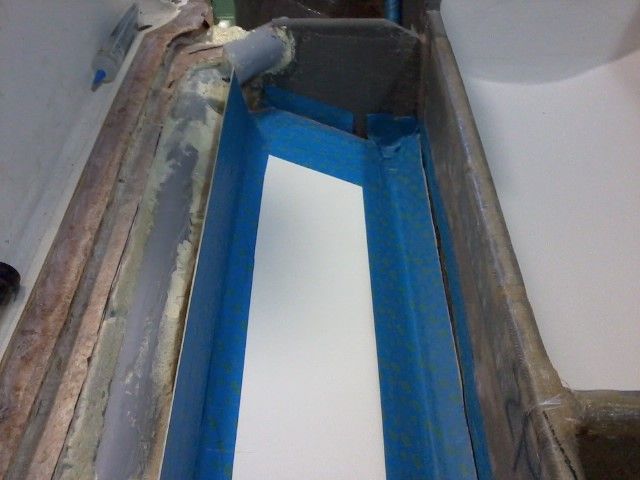
cut out new stringer core to fit around fuel lines conduit under helm area
glass fuel lines conduit stringer area and opposite stringer up to console interior back wall
glass underside of deck between forepeak hatches
glass several layers reinforcement on underside of deck where T top legs mount(methacrylated FRP panels instead)
clean fuel cell area/prep for fuel tank
install fuel tank and foam
drill fuel pick up and ground bond wire hole in rear bulkhead
add putty to hole then redrill smaller and bevel edges on both sides
glass mid-tank deck support beam
install beam and fillet putty and glass to stringers
trim down foam and glass from t
Mojo logo design:

Crescent moon will probably turn into a fish at some point, but this is a starting point.
www.scmarine.org
www.joinrfa.com
Luke 8:22-25
very cool.