Phin,
You did an awesome job on this boat. I’m looking at buying the exact same model at an auction right now. What size motor do you have on it? And if you don’t mind me asking what would such a motor cost if I was to repower the boat I’m thinking about buying.
quote:
Originally posted by FollyPhin,
You did an awesome job on this boat. I’m looking at buying the exact same model at an auction right now. What size motor do you have on it? And if you don’t mind me asking what would such a motor cost if I was to repower the boat I’m thinking about buying.
Thanks. Lots more work to be done.
This in an '88 model boat. My dad has a '79. They are nearly identical. In 1988, they changed the model name to “211” instead of “21.” The difference is the 211 is about 6 or 7" longer, and the rear storage boxes all the way at the transom are top access in the 211 vs side access in the 21. The old 21 side access was to hold the batteries back there. Big pain in the butt for larger batteries like newer motors need. The batteries need to be under the console anyway.
This one’s motor is a 2001 200HP Yamaha HPDI. We took an old Johnson Ocean Pro off dad’s and put on a 200HP Suzuki four stroke. This heavier 4 stroke totally changed how the boat sits in the water and rides, and a 175 suzuki would have been better in retrospect. The transoms are already cut low in these boats, and the extra weight of the v6 4 stroke makes water come in thru the scupper drains and over the transom when it’s a little choppy. Porpoising when running is also pretty significant. 2 stroke power or either the brand new lighter yamaha 4 strokes are the way to go. a 175HP suzuki would work, but I think 200-250HP is what these hulls can handle.
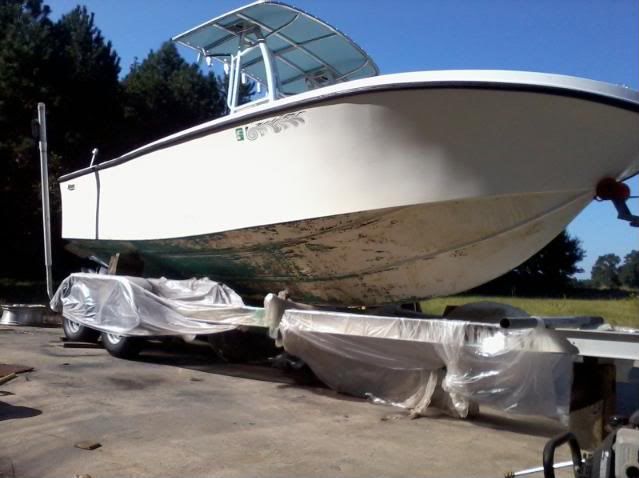
With the crusty bottom paint, the 200 I’ve got pushes the boat 40mph at 5200RPM’s WOT with an offshore load. With any trim tab being used, those numbers decrease. Nearly every time I’ve been offshore with this rig I have been able to run it WOT comfortably. It isn’t underpowered, but it can definately handle more HP… I may need a better prop, or I may se
Thanks for the advice Phin. My dad and I are actually looking at going in together on a 2000 221. I thought it was a 1990 model hull until I just looked at it again. It has a 2000 200Hp Evinrude Ocean Pro on it and I’ve heard those motors are POS’s so eventually we’d probably put a Yamaha on it. The one I’m looking at already has the T-top but has some cosmetic problems…nothing I couldn’t handle on my own. It does have bottom paint on it but I’m not too worried about bottom paint. It does have trim tabs but they’re recessed on the 2000 221. A 221 would be perfect for what we’re looking for, something that me, my dad, and my two brothers can go in, stay inshore but is also stout enough to hit the jetties.
The boat you are looking at has a bit more room than mine as well as more fuel capacity I think. Outer hull is very similar. Mako’s after about 1996 were built by different folks than the old ones also. Tracker Marine owned Mako by 2000 I believe, and some things changed with the construction and quality.
Here is a good history on the older 21/22’s
http://www.classicmako.com/forum/topic.asp?TOPIC_ID=389
The Ocean Pro’s were good motors. There are a lot of them out there still running. Parts are cheap. The ones to stay away from were the FICHT ram injection ones from around that time. The Ocean Pro likes the gas and oil, but I wouldn’t call it a bad motor…
Good luck with the shopping!
www.JoinRFA.org
Luke 8:22-25
Fun times this weekend.
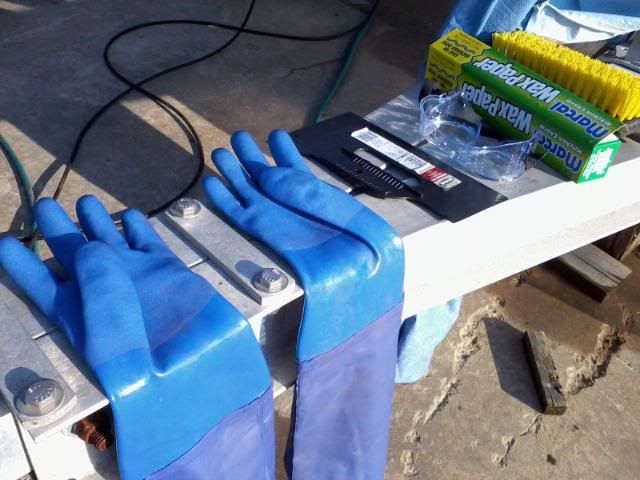
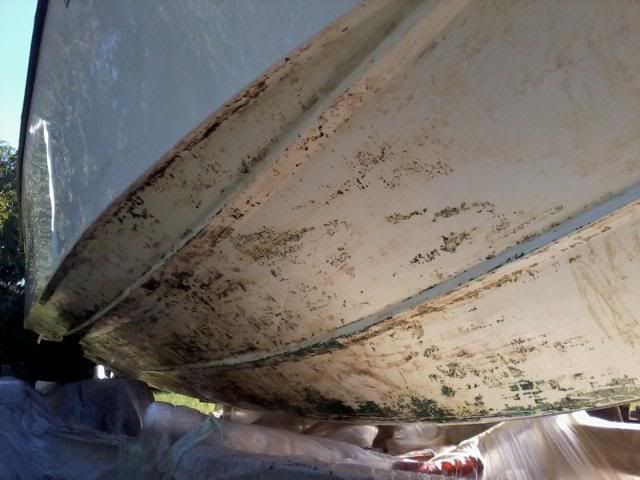
During and after first round Friday afternoon:
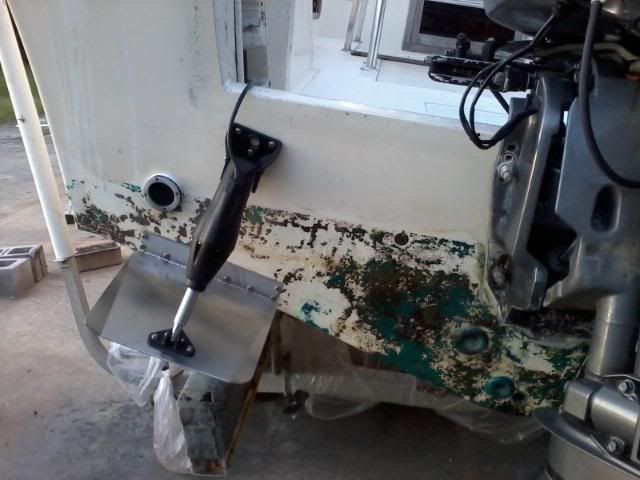
After 2nd round Saturday.
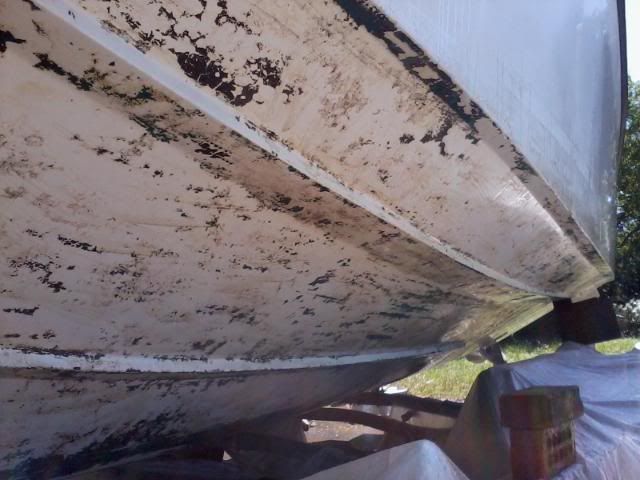
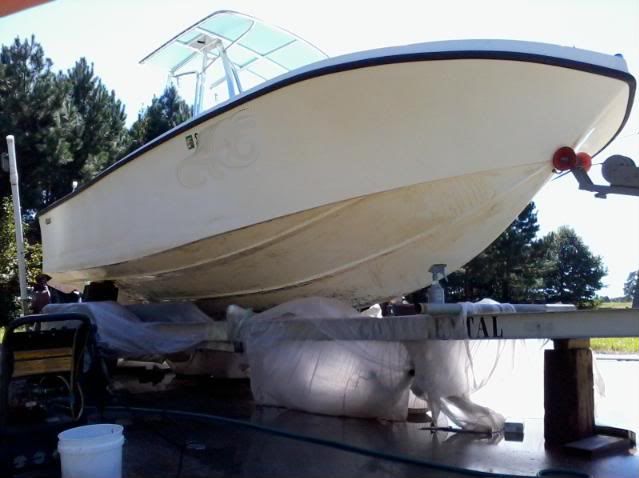
After 3rd round Saturday afternoon.
Shadow is messing pic up, but the paint’s gone off this side now.
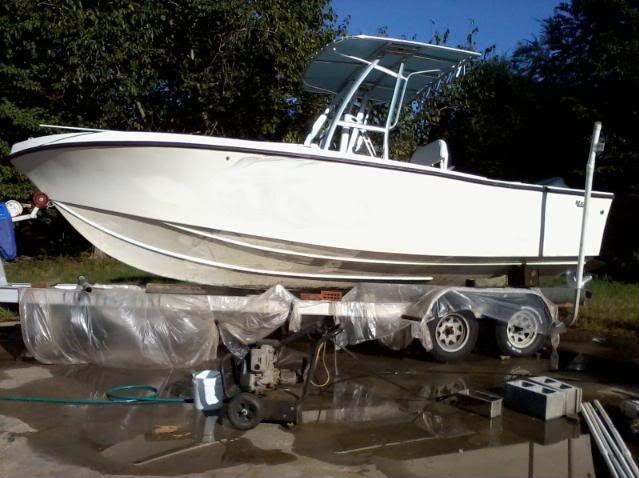
Sunday afternoon… sanded the e box with 320 grit then 600 grit and masked.
And put rustoleum “appliance epoxy” on.
www.JoinRFA.org
Luke 8:22-25
You can help contribute to my boat rehabilitation fund by purchasing items here:
http://old.charlestonfishing.com/forum/topic.asp?TOPIC_ID=105156
![]()
www.JoinRFA.org
Luke 8:22-25
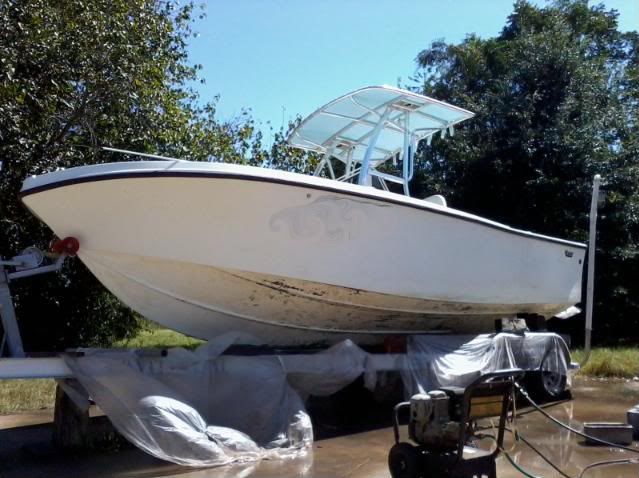
Dang bo. I think I’d of left that bottom paint on. It looks great but man that looks like a lot of work.
It is a lot of work… I have been trying to think of what it’d take for me to take bottom paint off somebody else’s boat. Thought about $30 a foot, but realized it’s definately more work than that. Maybe $40 or $50 a foot, and I’m still not sure that’d be enough!
www.JoinRFA.org
Luke 8:22-25
Phin, Would soda blasting have taken the bottom paint off without damage to the gelcoat? I’ve heard of it, but never known anyone who had it done so I’m more curious than anything.
![]()
Loose I am sure that soda would do the trick without harming the gelcoat. It works wonders on old cares yet doean’s harm the rubber weather-stripping or glass.
21’ Sea-Pro CC
Yamaha 150
“Aquaholic”
2008 Dodge Ram Mega-Cab 4x4 6.7 Cummins
“There is no hunting like the hunting of man, and those who have hunted armed men long enough and liked it, never care for anything else thereafter.”
Ernest Hemingway
Would love to try it. Is it just baking soda or something that be bought in bulk from a milling place? Run it through a regular sand blasting tub and hose?
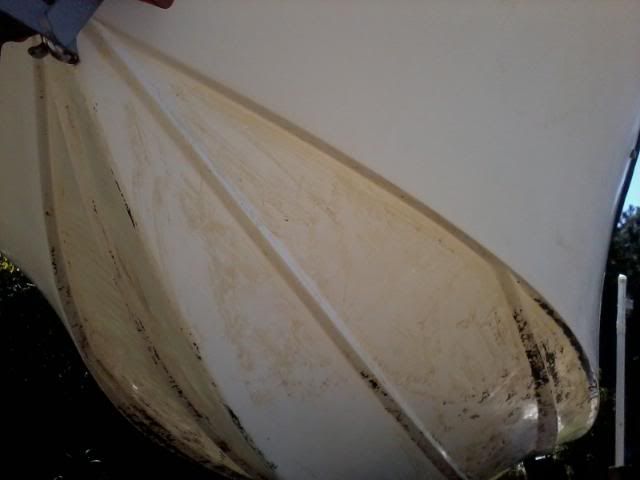
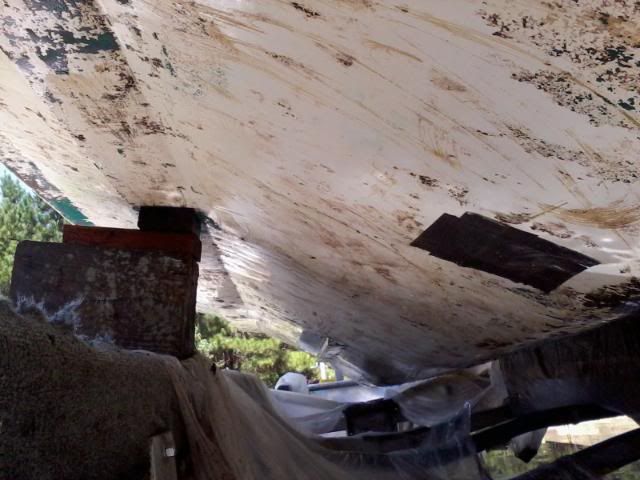
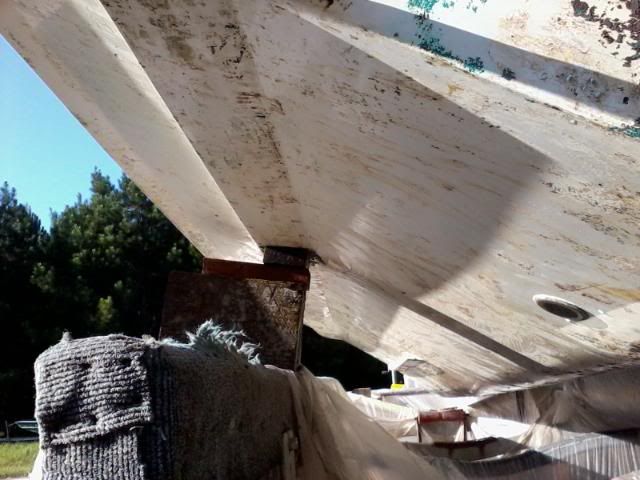
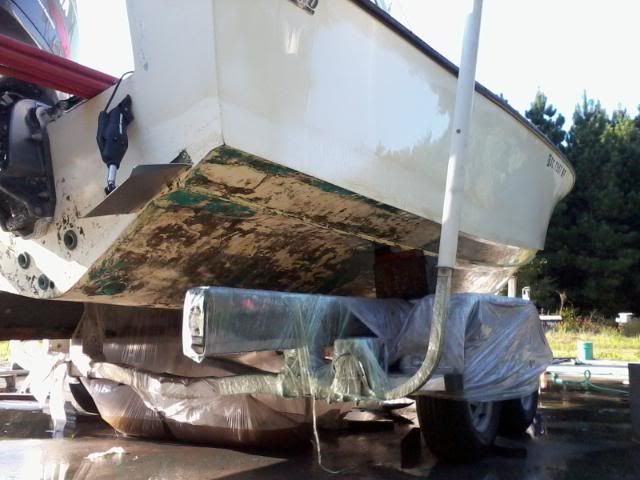
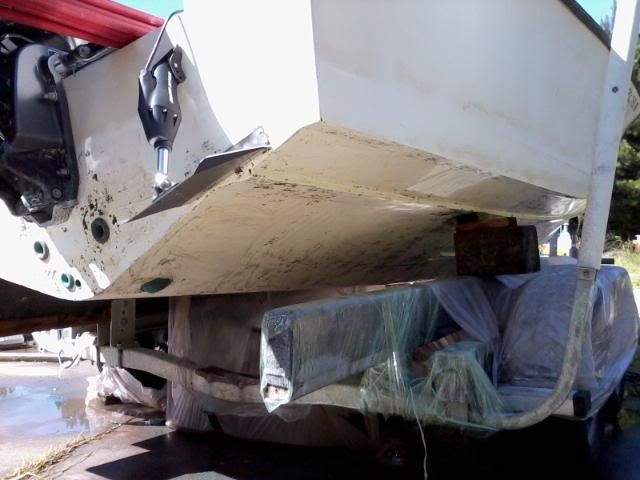
Here are more pics of the starboard side. I will do each angle together so you can see the difference between rounds. Only three pics from each angle, but this is 4 rounds. Still a little more left, but I can sand or either spot treat a few areas and then sand and buff.
www.JoinRFA.org
Luke 8:22-25
Phin, you can’t use a regular media blaster unless it has been modified to use soda. A cheap conversion os found here: http://www.amazon.com/Convert-Abrasive-Blaster-Blasting-Retro/dp/B002T06KK8
Wikipedia says:
Applications
It can be used for cleaning cars, boat hulls, masonry, and food processing equipment. Sodablasting can also be used to remove graffiti[2] and to clean structural steel. Soda blasting is very effective for mold and fire/smoke damage cleanup as it cleans and deodorizes.
One paint manufacturer recommends against using their automotive epoxy primer over soda blasted substrates.[3] A refinish specialist from a major vehicle manufacturer does not recommend soda blasting prior to automotive refinishing.[4]
[edit] Tools
A Sodablaster is a self contained system that includes a blast generator, high pressure compressed air, moisture decontamination system, blast hose, and a blast nozzle. The blast nozzle in sodablasting applications is not a typical wear part, as a result nozzles can be ceramic or metal, such as tungsten carbide.
The blasting material consists of formulated sodium bicarbonate (also known as baking soda). Blasting soda is an extremely friable material that has micro fragmentation on impact, literally exploding away surface materials without damage to the substrate.
A Sodablaster differs from a sand blaster in that the Sodablaster is not gravity-fed, meaning it will not come out of the bottom of the pressure vessel.[citation needed] Sodablaster are direct pressure systems, not siphon/gravity fed.
21’ Sea-Pro CC
Yamaha 150
“Aquaholic”
2008 Dodge Ram Mega-Cab 4x4 6.7 Cummins
“There is no hunting like the hunting of man, and those who have hunted armed men long enough and liked it, never care for anything else thereafter.”
Ernest Hemingway
Looked into the soda blasting. It doesn’t remove all the paint- leaves a thin layer or else it does have to take down some of the gelcoat. Takes a high volume compressor also. I could use the system on a few spots, but I’ve already got 99.5% of the paint off. Sanding with 220 then 400 and so on is what’s next. Soda probably would have been good from the start until a little before this point.
Harbor freight has a soda blasting tank for $100 if anyone’s looking for one.
www.JoinRFA.org
Luke 8:22-25
Phin, could you post a quick lesson on getting your boat off the trailer. Thanks in advance.
phin, boat is looking great! keep up the good work.
14’ T-wide jonboat
25hp johnson
‘Git -n- Thar’
-My biggest worry is (when I’m dead)my women will sell my fishing gear for what I said I paid for it-
quote:
Originally posted by tigerhunterPhin, could you post a quick lesson on getting your boat off the trailer. Thanks in advance.
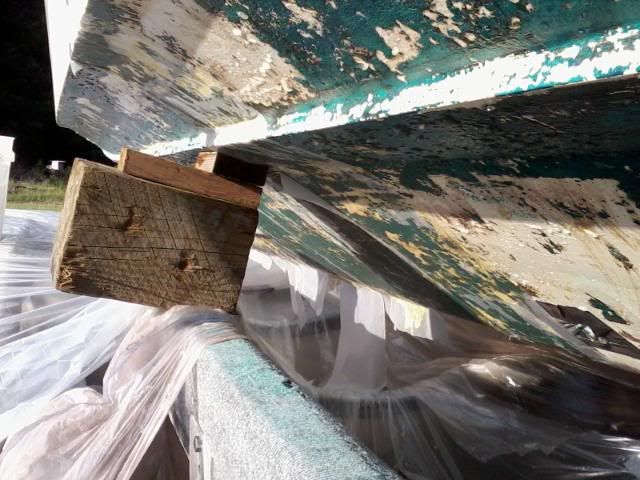
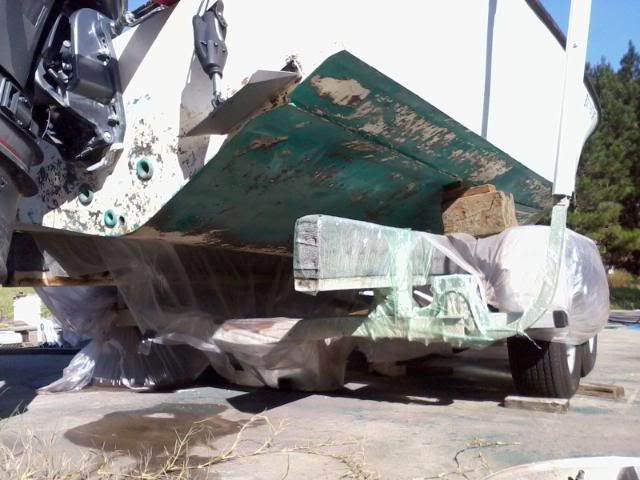
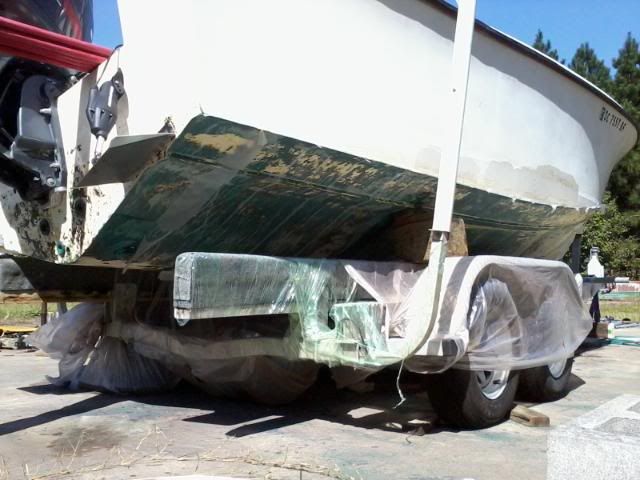
Couple different ways. Easiest thing I’ve found with a boat on a trailer needing bottom work is what you see in the latest pics above. Just do one side at the time. To do this, you just keep your winch holding the bow tight and start lifting one side and blocking between that side and the trailer bunk. You can get 10-15 inches of clearance to work with, and it’s pretty stable to work under. Having the side you’re working on lifted up like this makes removing bottom paint much easier for sure.
To get a boat all the way off the trailer, you will need to acquire or make some blocks or shims to make support stacks that you build up and then shift around as you pull the trailer out. I prefer wood to cinder blocks because cinder blocks have been known to crumble and colapse. If you do use cinder blocks turn them where the hollows are vertical and not on their sides. They can be more stable this way- especially criss crossed two wide.
Basically, what I do is jack the boat up with two bottle jacks, one on each side in the back. Start with the trailer tongue as low as possible. Once you get blocks under the stern behind the rear-most axle or cross member of the trailer, you then jack the bow up via the trailer jack. Block up the keel about midship at this point, and have this support stack as close to the back of a trailer support as possible. Lower the trailer tongue and pull the trailer forward until the next trailer part hits the keel support stack. At this point you will have to jack the keel back up and move the support stack to the other side of the trailer support member so you can keep moving the trailer out. During all
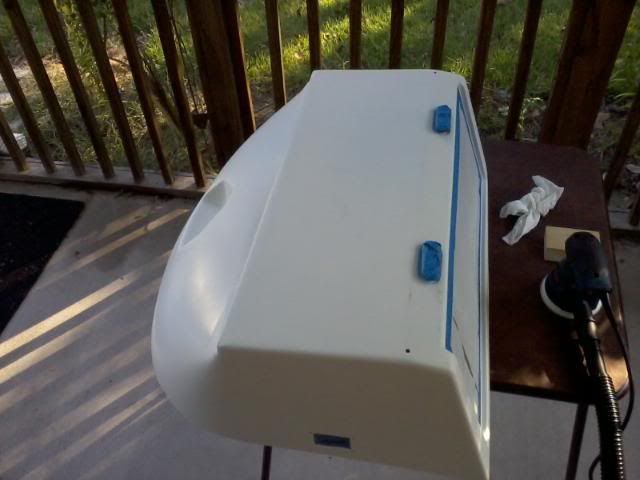
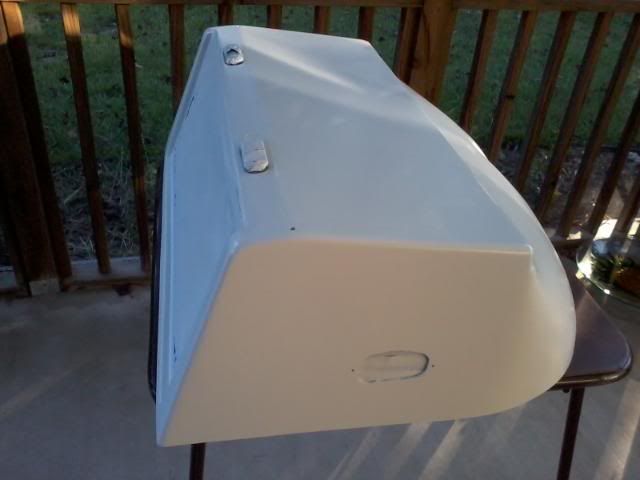
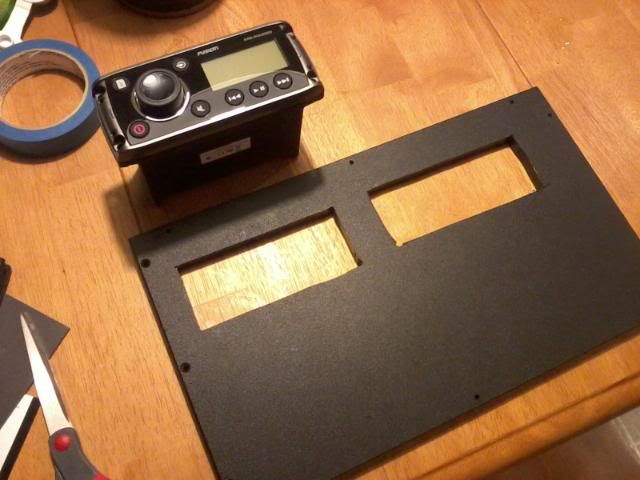
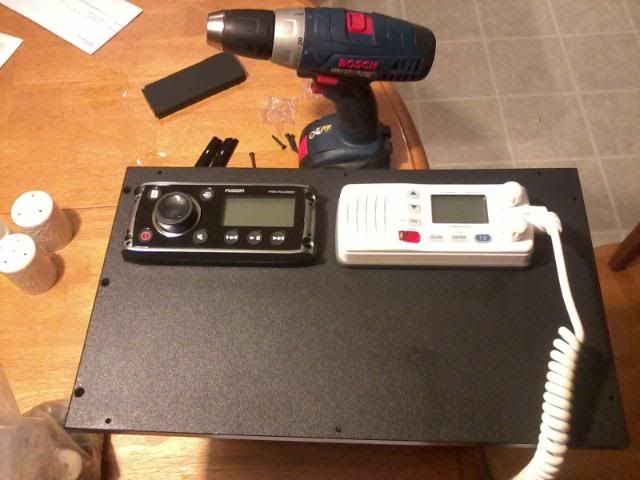
Got some work done on the electronics box and switch panel last week.
Cut out a hole to flush mount the Fusion stereo.
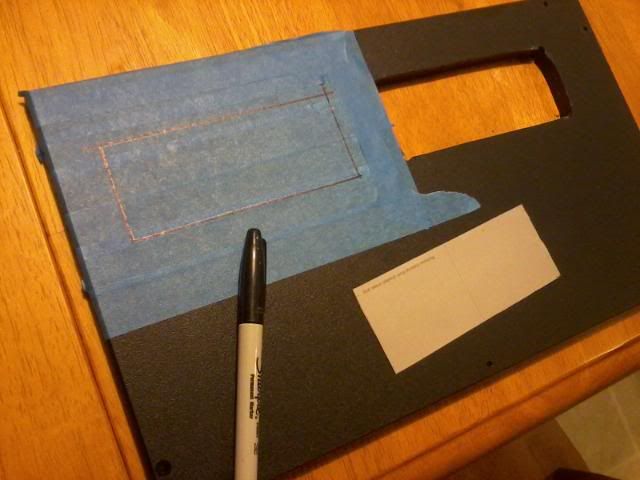
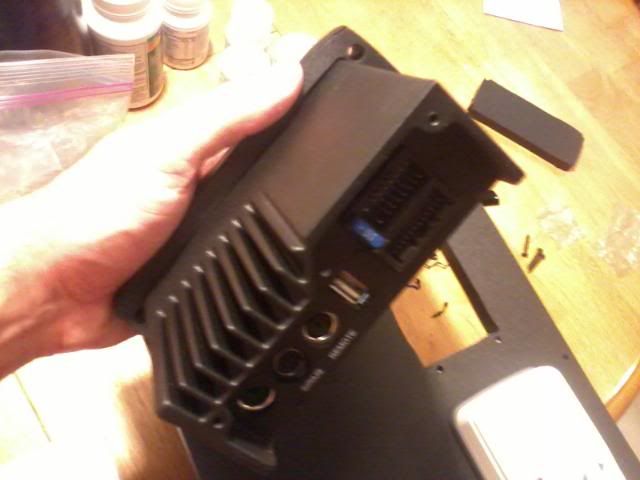
Also added a USB and AUX input port accessible from the side of the panel. Put in a 12V cig lighter plug above the USB/AUX port too, but didn’t get a pic of that.
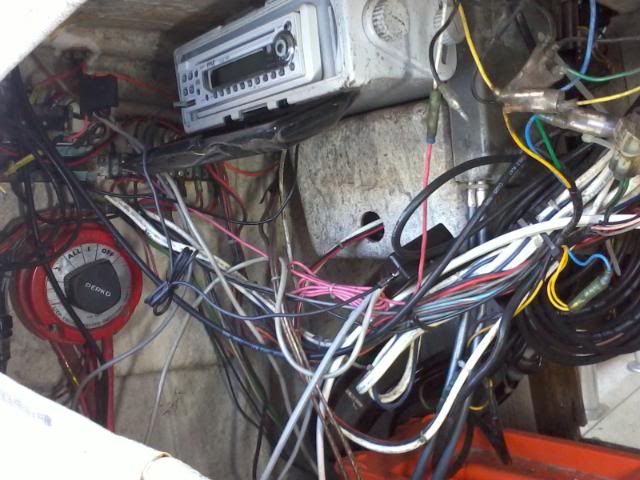
Moved on to the console and mounting the electronics box. Here are some before pics of the bird’s nest of wiring and old stereo under the console.
![]()

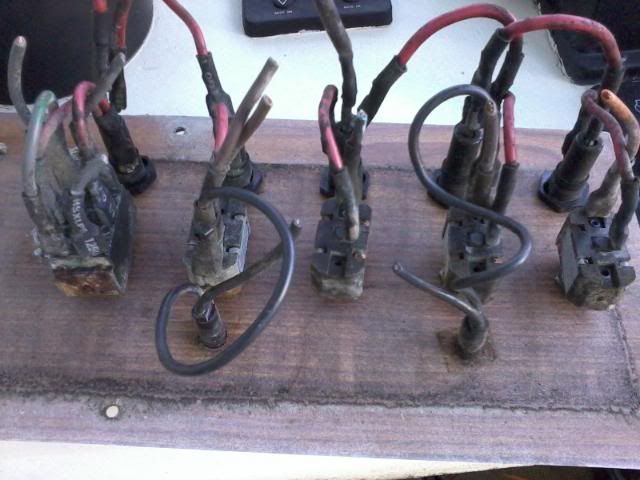
Here is the back of the old switch panel. Nasty…
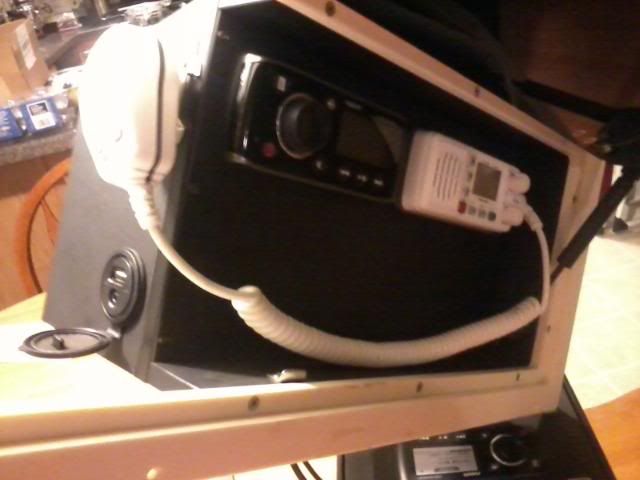
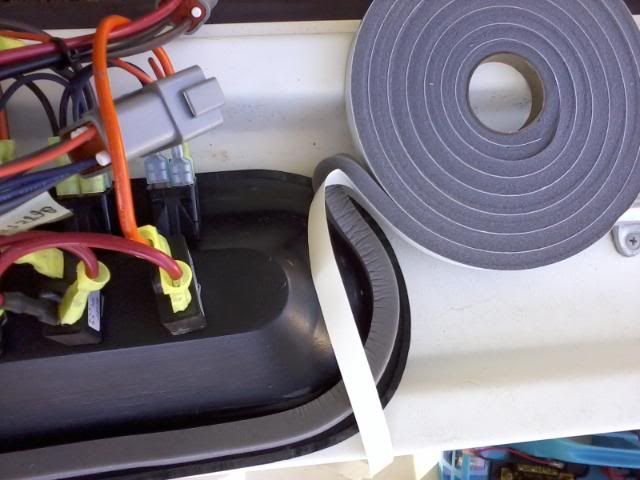
Resized the hole for the new switch panel, and put foam weatherstripping on the panel to keep water from leaking onto the breakers and switches.
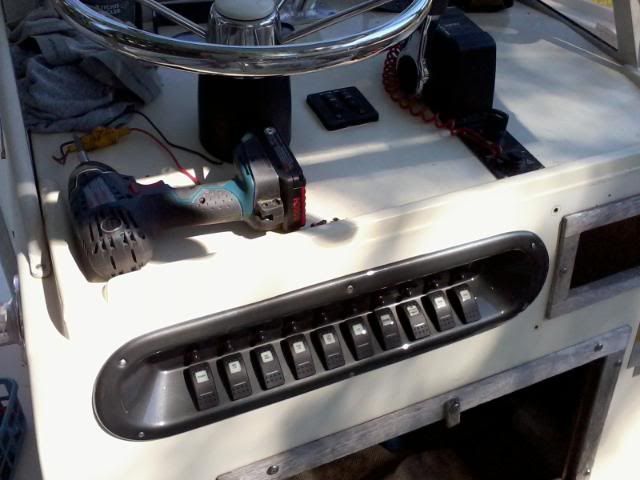
Installed new switch panel.
More pics later. Plan to get the speakers mounted in the bottom of the e box, run the wiring from the console to the e box, and replace majority of wiring in the boat this week.
www.JoinRFA.org
Luke 8:22-25
That recessed switch panel is slick.

Pillage and plunder with a 9wt and a fist full of clousers.
Doing good!! By the time you are done with her you should be ready for OUR new yellowfin/freeman right??
Set the trap boys, we going to pass through them again!!
I don’t know how Freemans are rigged, but I am aiming for some yellowfin type rigging of my boat at least.
![]()
Got all the wiring from the console to the e box pushed thru last night. Got it all in the starboard side tube so that it will be concealed by the flush electronics panel. Getting the power and ground through after getting a sheathed harness with everything else though was a huge pain. Tried some hard insulated 8 gauge separate cables I had, but they just would not make the turns I’ve got in the T top frame. I resorted to duplex tinned marine 10 gauge to get power and ground up to the e box.
What I found makes pulling duplex thru turns a lot easier was to cut back a few inches of the outer sheath, tie the fish tape or pulling string/wire/mono to the two inner cables at that point, and then let the smaller inner cables be allowed to flex to make turns better than uncut “double sheathed duplex.” Hope that makes sense- should have gotten some pix to show what I mean.
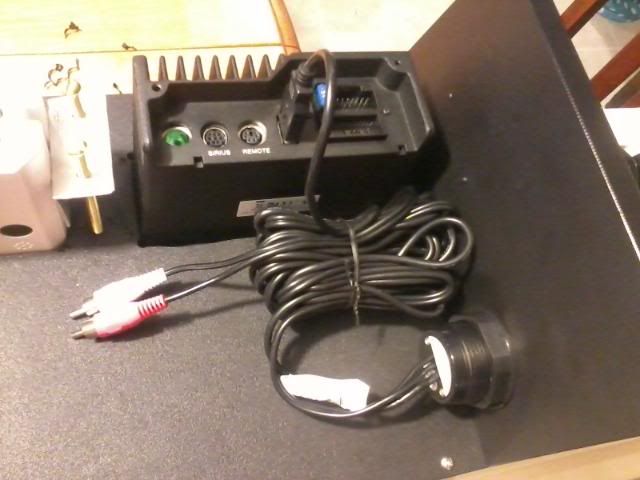
Inside my e box harness sheath separate from the duplex power/ground, I have:
- lowrance ethernet cable for sirius radio/weather
- 16ga wire for horn
- 16ga wire for switched power on (runs from main switch panel ON switch to Fusion stereo)
- 16ga wire for “dim” (from instrument lights switch to Fusion to auto dim the display and buttons’ lighting)
- 16ga wire for anchor light
- 20ga wire for NMEA0183 +
- 20ga wire for NMEA0183 - (from Lowrance GPS on dash to VHF in ebox for position display and DSC)
The 10 gauge power lead in the duplex will run from the fuse box with a E BOX label and 30amp fuse on it.
Got two blue seas battery switches that I will put into a fold down panel next to the fuse block accessed through the front of the console. Also have a volt meter that I’ll put on the starting battery circuit since I’m going to use the Yamaha’s built in charging isolator to make a true starting circuit and separate house circuit. No ACR or combiner needed- just a 2nd lead from the engine’s auxilary charging plu